Showing posts with label DIY. Show all posts

Wednesday, July 8, 2015

DIY Soothing Acne Mask


This recipe comes from my school days.  A group of us worked on different DIY masks to soothe acneic skin and this one was the winner.

2 tbsp of powdered oatmeal
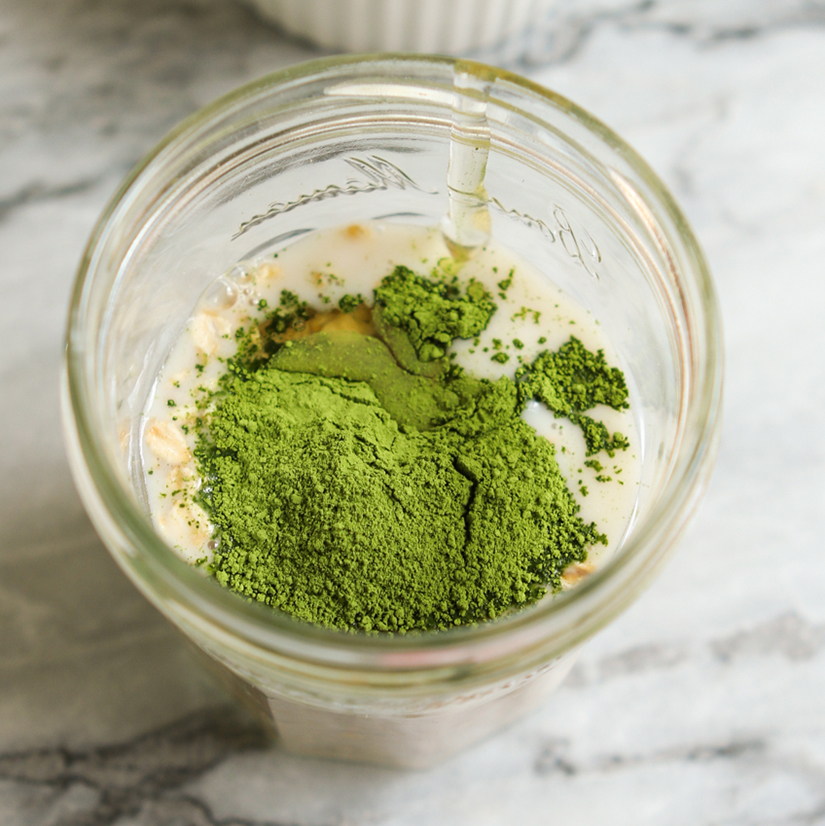
1 tbsp of powdered green tea
2 tsp. of milk
1 tsp. of honey

Put all ingredients in a food processor (or you can blend by hand, but the honey should be heated to make it more fluid) and apply to the skin for 10 minutes.

Green tea is an anti-oxidant, oatmeal with soothe the skin, milk contains lactic acid and honey is a natural humectant.

Enjoy!

Tuesday, October 14, 2014

DIY: Pumpkin Spice Facial Scrub


Everything is coming up pumpkin spice!

I know I can't resist the smell, can you?  Did you know that the smell of pumpkin pie stimulates arousal in men?  Well I'm not here to share my recipe for homemade pumpkin pie (although it is a killer recipe), but instead I am here to share my recipe for a pumpkin spice facial scrub that will leave your skin silky smooth and smelling delish.

Pumpkin contains beta-carotene (antioxidant/controls pigmentation), Vitamins A, C (antioxidants) & E (helps to maintain barrier function), Alpha-carotene (antioxidant), zinc (helps to maintain hormone levels), and lutein (aids in hydration and elasticity).


What You'll Need:

1/4 cup of brown sugar
1/4 cup white sugar
1/4 cup coconut oil (liquified) or jojoba oil
1 tbsp. pumpkin puree (organic or homemade-puree some of your leftover jack-o-lantern pulp)
1/4 tsp. pumpkin pie spices

Mix the dry ingredients together and then add the oil and pumpkin puree.  Mix the ingredients completely and apply a generous helping of the scrub to each area of your face, neck and decollete.  Working each area one at a time rub in a circular motion for a minute or so.  Rinse with warm water and follow with your favorite moisturizer if necessary.


Saturday, July 27, 2013

Cutting, Tying and Drying Lavender

I like to use my own lavender in the beauty products that I make as well as for cooking. Since I use no pesticides or fertilizers in my garden I know that it's safe. Lavender is great for the garden, it invites bees and keeps away invasive pests such as aphids. If you can grow your own lavender you definitely should.

Lavender is harvested just as the buds are beginning to open. Unfortunately this year I was away for a month, and London had very hot and dry weather. My lavender was a bit overdue by the time I got home, but there was still plenty that I could use.


  1. The first step is to gather the flower stems into bunches and cut them.


  2. Next, strip off the leaves and pull out any bad stems.


  3. Separate the stems into short, medium and long piles.


  4. Line up the flower heads and tie into bunches. You should tie directly under the flower heads as well as several inches down the stems.

  5. Dip the tied flowers into slightly soapy, cold, water, I use a non-toxic Ecover. Then rinse them under water and blot dry with paper toweling.


  6. Hang to dry. Note that after a week or so you will have to retie the strings, because the stems will shrink a bit as they dry


In about a month the flowers will be dry enough to start using. There are many uses for lavender and many recipes out on the web. I use them in my lavender and rose body scrub, I grind them into salt and sprinkle over boiled potatoes and simmer them in milk for a bed time treat.

Sunday, April 29, 2012

DIY Coconut Sugar Scrub


I took a class at Handcraft Bodycare yesterday and one of the things we made was a coconut body scrub...it was simple to make, smells divine and my skin is super soft and yummy smelling after using it. I must admit, it tastes good too. Here's the recipe for you:

  • 6 tablespoons of course brown sugar
  • 3 tablespoons of fine white sugar
  • 2 tablespoons of ground coconut
  • 5 drops of coconut fragrance oil
  • 1 teaspoon of vitamin E oil
  • Enough grape seed oil to cover the mixture and still leave about a 1/4 of an inch of oil on top. The amount of oil will vary depending on your taste. Some people like their scrubs very dry and others prefer more oil.
Mix all the dry ingredients in the pot you will store it in and then add the oil last. Enjoy!

Sunday, December 11, 2011

Steps to Effectively Control Acne Breakouts


Here is some general information on acne and how to control breakouts. Now I am not a doctor so my advice is not the end all, be all, but it gives you a good place to start. I also have a great DIY acne mask that you can try.

  • Control abnormal keratinization and pore blockage (exfoliate): The initial trigger in the production of acne papules is the increased adherence of keratinocytes to the follicle wall and increased sebum production, resulting in a plugged pore. Skin cells often do not shed enough on their own; creating a buildup of surface cells that traps oil and bacteria. Using gentle peeling agents that control bacteria and oil production as well as loosen impacted stratum corneum cells allows treatment products to penetrate more effectively. Using a daily care product with low level retinol in conjunction with anti-inflammatory exfoliating treatments allows for better skin function and improved cell turnover rates with minimal irritation.
  • Control sebum (oil) production: In acne-prone skin, increased sebum and P. acnes bacteria build up behind the plug and can trigger an inflammatory response. It is important to understand that over-drying the skin, even if it is oily, will cause the skin to compensate by producing an excessive amount of sebum. This will cause even more breakouts. Natural astringents that also moisturize will avoid this over-production of sebum.
  • Decrease P. acnes proliferation: Topical oxygen sources, such as benzoyl peroxide and hydrogen peroxide, effectively deliver oxygen to the follicle, killing the anaerobic bacteria. Increasing cell turnover and gentle exfoliation, ensures that P. acnes will not be trapped in a deoxygenated environment and allowed to proliferate.
  • Control inflammation: Inflammation is both a cause and result of acne. When the number of P. acnes increases sebum is broken down into irritating free fatty acids which stimulate an immune response. White blood cells weaken the follicular wall, resulting in rupture and increased inflammation. Utilizing anti-inflammatory topical ingredients will soothe current irritation and help to avoid future inflammation. 
Some common and effective sebum controlling ingredients are: salicylic acid, ginger root, green burnet root, licorice root, cucumber extract and cinnamon bark. In addition there are several beneficial oils important in the treatment of acne as they contain very helpful naturally derived fatty acids. These include, but are not limited to borage seed oil, grape seed oil and essential wheat germ oil.

Friday, November 26, 2010

DIY: At Home Pumpkin Honey Face Masque


Pumpkins aren't just for pies.

I was just thinking about posting a DIY for creating a pumpkin facial mask and then I saw this blog post and figured why not just post theirs (yes I'm still feeling a bit lazy from chowing down yesterday).

If you want to change this recipe up a bit you can try adding some ginger juice (grind up enough ginger to extract 1/2 tsp. of juice - usually a couple of inch thick slices will do) or a tablespoon of thick greek yogurt to thicken it up and add some lactic acid.

Sunday, September 26, 2010

DIY: Create Your Own Microdermabrasion Cream


Ingredients:

1 tbsp. aluminum oxide crystals
2 tbsp. creamy cleanser


Directions:

This is a 2 to 1 ratio so you can make any size you desire.  You should use a very fine grit for the aluminum oxide crystals, for example 120.

Mix all ingredients thoroughly.  Wet your face, scoop up a dime sized portion, and massage in a circular motion for a couple of minutes.  Rinse with cool water and moisturize afterward.

A light coating of organic coconut oil works as a great post-exfoliation moisturizer.


The Queen's Faves!


Wednesday, April 21, 2010

DIY: Create a Mask for Acneic Skin


Aspirin is created from the bark of the willow tree and it contains salicylic acid. Salicylic acid is especially helpful in treating acne because of its ability to penetrate the follicle. It encourages the shedding of dead skin cells from within the follicle, helping keep the pores clear of cellular debris. In this way, it reduces the number of pore blockages and breakouts on the skin.

It is common for someone having a breakout to want to just scrub it away. This is not the right thing to do. If you're having a breakout and you scrub the skin you will increase inflammation and compound the issue. Another typical home remedy is to apply astringents, such as rubbing alcohol, to the inflammed skin. Applying astringents not only dries out the skin, in turn causing it to overproduce oil, but it shrinks the pores and when your pores shrink, more oils are clogged in the pores of the skin.

The best combination is to keep the skin moisturized (jojoba oil is excellent for acneic skin) and to bring down inflammation. There are many professional products out on the market, such as PCA's Clarifying Mask, but if you're in a pinch and need to deal with a breakout "stat", give this DIY acne mask a try.

Ingredients:

5 uncoated aspirin
1 tsp honey, yogurt or aloe vera gel

Directions:

Crush the aspirin and mix with a small amount of water to create a paste. Mix in the honey, yogurt or aloe vera gel and apply to face for 10-20 minutes. Rinse with warm water.


Sunday, April 4, 2010

DIY: Beating Heat Rash or Razor Burn


If you've ever experienced heat rash or a razor burn you know how uncomfortable it can be. Razor burn comes from applying too much pressure during shaving, dull blades, dry shaving (check this article for an awesome shaving cream) or shaving in the opposite direction of hair growth.

Heat rash; also known as prickly heat, prickly heat rash, miliaria, or red miliaria; is the result of clogged pores. Pores become clogged with sweat, dead skin, and bacteria. Once this has happened, sweat has no choice but to seep into, rather than onto, the skin. This usually happens at places on the body where skin meets skin such as armpits, the groin, between thighs, and under breasts. It can, however, develop on the back, face, abdomen, neck, chest, and at the hairline.

Whatever you want to call it and however you got it doesn't really matter when it comes right down to it. All you know is that it burns and it you want to get rid of it. Of course with heat rash you want to get out of the sun and into a cool bath as soon as possible.

This DIY Heat Rash/Razor Burn buster will help to soothe your aching skin.

Ingredients:

4 oz. distilled water (you can buy it in most grocery stores)
8 drops of lavender essential oil (easily purchased at health food stores)

Directions:

Combine the ingredients and place into a spray bottle (a glass bottle is best, but plastic will do in a pinch) and spray lavishly over the area to be treated. You can also use the leftover to freshen your bed linens.

Friday, February 19, 2010

DIY: Create a Mask for Mature Skin

Facial Masks


Ingredients:

1 tbsp. honey
1 tsp. jojoba oil
1 tbsp. yogurt
1 egg yolk

Directions:

Mix all ingredients and apply to face for 10-20 minutes. Rinse with warm water.


DIY: Create a Mask for Soothing Inflamed/Acne Prone Skin

Ingredients:

1/4 c. oatmeal flour (grond very fine)
1 tbsp. honey
1 tbsp. green tea (ground very fine)
distilled water

Directions:

Combine the first 3 ingredients and then add the water just a little bit at a time until the mask has a consistency similar to a thick soup. Apply to the face with a fan brush and leave on for 10-20 minutes. Remove with warm water.


Monday, February 15, 2010

DIY Disincrustation Solution

Tired of paying too much for disincrustation solution? Do you know what disincrustation solution is? If you answered yes to both than this post is for you.

Disincrustation solutions are used to soften sebacious matter (oil) and make extractions (squeezing out blackheads) much easier. You can pay a lot of money for name brand solutions, but why bother when you can make it yourself for just a couple of cents.

Ingredients:

1 tsp. baking soda
8 oz. distilled water

Preparation:

Mix the baking soda and distilled water in a bottle that you can shake. Apply the solution to 2x2's or cotton pads and then cover the area to be extracted for 10 minutes. Apply steam if possible to help open the pores (hot towels will do if you don't have a steamer). Extract away!

You may feel a tingling sensation and that's ok, if it feels more like a burning sensation then you need to cut back on the baking soda (try 1/2 the amount).